How to Install a Fireplace Mantel on Different Types of Walls
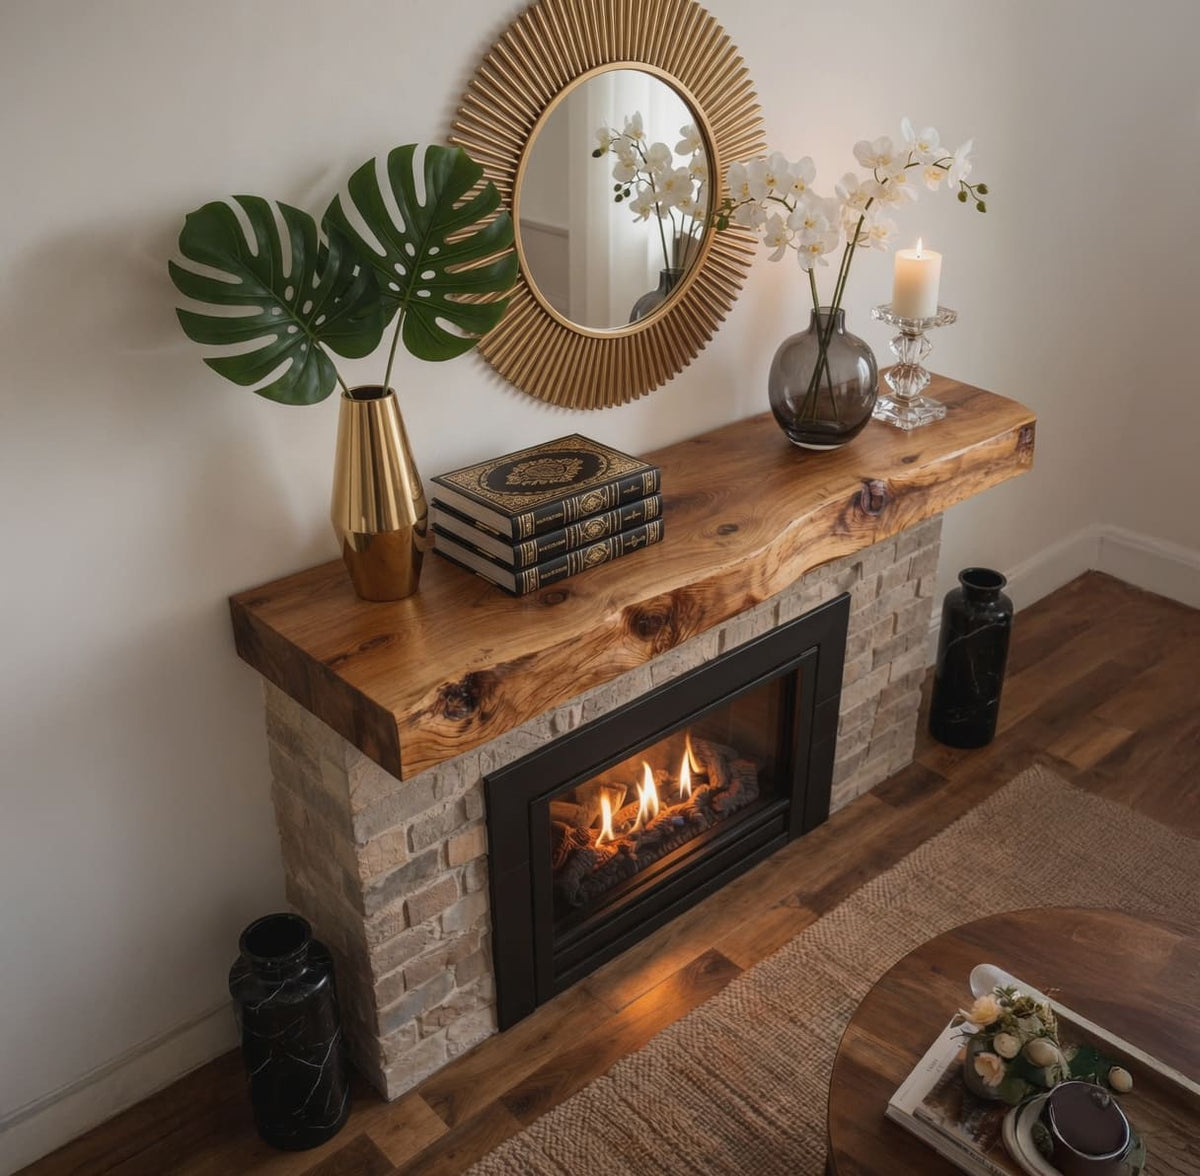
How to install a fireplace mantel depends on the wall, not the Instagram photo. Brick, stone, drywall, and concrete each need different bits, anchors, and a different definition of "tight." Attaching a fireplace mantel the wrong way is how a $750 beam becomes a 40 lb projectile.
This is a fireplace mantel installation guide for the walls people actually have. It covers floating rods, lag bolts into studs, masonry screws, and when to stop and hire someone.
As a handmade furniture brand, we ship solid wood mantel shelves that are only as safe as your fasteners. Read this before you drill.
If you still need height and fire clearance, get those numbers first from mantel on fireplace. Combustible wood needs at least 6" from the firebox opening, and deeper shelves need more. Manufacturer specs beat blog charts.

Before You Touch a Drill
Fireplace mantel installation fails for three boring reasons: the shelf is too close to the fire, it is not level, or it is hanging on drywall.
Do this on paper first.
1. Confirm fireplace type. Wood-burning, gas, or electric. Wood-burning is the strict one. Gas and electric still have manufacturer clearances. Do not copy a neighbor's height.
2. Measure the firebox. Width of the opening. Height from hearth to the top of the opening. Surround thickness if you have brick or stone in front of the wall.
3. Pick width and depth. 3-6" of mantel past the firebox on each side. 6-10" depth is the usual range. Ashdeco shelves are 8" deep, 30" to 79" wide. Full chart: fireplace mantel size guide.
4. Identify the wall. Knock. Look at the sides of the fireplace. If you see brick through the opening, you may still have drywall above the lintel. Do not assume.
5. Decide the look. Floating (hidden rods or a hidden ledger) vs visible corbels vs a full surround that sleeves over cleats.
6. Finish the wood first. Stain and oil before it goes on the wall. You will not enjoy finishing around brick dust.
Two people is not optional for anything over 48". A solid wood beam is awkward, top-heavy, and unforgiving if it scuffs the surround.
Tools
You will not need every item for every wall.
- Tape measure, pencil, painter's tape
- 4-foot level (plus a torpedo level for front-to-back)
- Stud finder (drywall)
- Drill / driver
- Hammer drill + masonry bits (brick, stone, concrete)
- 3/8" or 1/2" wood bit for rod holes in the mantel
- Lag bolts or structural screws (stud walls)
- Sleeve anchors, Tapcon-style screws, or threaded rod + epoxy (masonry)
- Construction adhesive rated for the materials
- Socket wrench
- Safety glasses, dust mask
- Shims
- Helper
Skip plastic drywall anchors. They are for towel bars.

Method A: Wood Stud / Drywall - How to Install a Fireplace Mantel on a Framed Wall
Drywall is not structure. Attaching a fireplace mantel to gypsum and hoping is how shelves fail.
Find the studs
Use a stud finder, then confirm with a small nail or a thin bit. Standard spacing is 16" on center. A 60" mantel should hit at least two studs. Three is better.
If the fireplace chase is a prefab metal box, the "wall" above it may be a false front with almost no wood. Open a small inspection hole if the finder is confused. Guessing here is expensive.
Two solid ways to attach
Hidden steel rods. Drill level holes in the wall, into the center of each stud. Typical rod is 1/2" diameter, long enough to bury 3-4" in the wall and 4-6" in the mantel. Transfer those centers to the back of the beam. Dry-fit. Then adhesive in the mantel holes, slide on, check level, wait.
Ledger / French cleat. Screw a 2x4 or steel cleat into the studs. The mantel is hollowed or built to sleeve over it, then screwed down from the top or the unseen back edge. This Old House likes this method for surround-style mantels because you can still get the shelf off later.
Lag bolts through the shelf into studs also work. You will see the heads or you will plug them. It is the most honest DIY install.
Do not use toggle bolts as the only support for a solid wood mantel. They are a backup, not a plan.
Weight expectations: how much weight a fireplace mantel can hold. Planning number is about 50 lbs per stud you actually lag into.
Same stud logic as smaller shelves, with more mass: how to mount floating shelves and install floating shelves step by step.

Method B: Brick - Fireplace Mantel Installation on Masonry
Brick is the most common "real fireplace" wall, and it is the one where people argue about mortar vs brick face.
Our preference
Drill into the brick, not the mortar, when you can. Brick is denser. Mortar is easier and weaker, and it fails first when the freeze-thaw cycle works on an exterior chimney breast.
If the brick is old and crumbling, mortar joints plus epoxy-set rod can still be the less destructive path. That is a judgment call. When the brick spalls, stop.
Floating rod method (clean look)
- Mark a level line at the bottom of the mantel. Recheck clearance above the firebox.
- Mark rod locations. Two rods minimum under 60". Three on longer beams. Keep rods in from the ends so you are not splitting the wood.
- Hammer-drill into brick. Blow out the dust. Dust kills epoxy.
- Dry-fit rods. They should be dead level with each other. A 1/8" error shows as a tilted shelf.
- Transfer rod positions to the back of the mantel. A helper holds the beam against the rods to mark, or you build a simple template from cardboard.
- Drill the mantel holes slightly oversized so you can still micro-adjust.
- Set rods with the specified epoxy. Do not load them yet.
- Dry-fit the mantel. Shim if the brick face is wavy.
- Adhesive in the wood holes, slide the mantel on, brace it, let it cure.
Cleat method (surrounds and three-sided mantels)
Screw a treated or hardwood ledger to the brick with masonry screws. Inset it about 3/4" if the mantel has a finished interior. Sleeve the mantel over the cleat and fasten from the top or sides with finish screws. Caulk the reveal.
Tom Silva's version of this is still the one we point DIYers to when they have a full mantel with legs, not a single floating beam.
Fastener notes
- Hammer drill, carbide masonry bit.
- Anchors rated above the expected load. If you want 100 lbs on the shelf, do not use anchors rated 40 lbs each and call it two of them. A deep shelf with weight at the front edge eats those ratings.
- Construction adhesive is extra, not a substitute for mechanical fasteners.

Method C: Stone and Uneven Masonry
Stone is brick's difficult cousin. Faces are uneven. Veneer may be 1" thick over plywood. Natural stone may be 4" thick and harder than your bit.
Find out if it is veneer. Look at an edge, an outlet cutout, or the firebox return. If you can knock and it sounds hollow, you are not drilling into "the wall." You are drilling into a skin. Fasten through to the backup wall or add a ledger that reaches structure.
Shims are normal. A floating beam on wavy stone will rock unless you pack behind it. Color-matched shims or a discreet caulk line after.
Bits. Carbide for masonry. Diamond if you are in granite or dense limestone. Go slow. Water if the stone starts to glaze.
Anchors. Sleeve anchors or epoxy-set stainless rod. Toggle bolts only if you confirmed a cavity and you still have a mechanical path into structure. Do not glue a 60" beam onto stacked stone with construction adhesive and faith.
If the stone is fragile or historic, hire a mason. A cracked keystone is a worse souvenir than a contractor invoice.

Method D: Concrete and CMU Block
Concrete is slow and then suddenly easy, once the holes exist.
Use a hammer drill. Mark, drill, vacuum, repeat. Expansion anchors or epoxy-set rod. For hollow CMU, you need anchors made for hollow block (toggle-style masonry anchors or epoxy that mushrooms in the cell). A sleeve anchor in a hollow cell does nothing.
This is the wall where we most often say: if you do not already own a hammer drill and the right bits, the rental plus a pro is cheaper than a ruined mantel.
Method E: Metal Prefab Fireplaces and Thin Surrounds
A lot of 1990s-2010s fireplaces are a metal firebox with a drywall chase. The "brick" you see might be a 1/2" facing.
You cannot treat that facing as masonry. Find studs in the chase. Attach to those. Keep combustible clearance off the listed metal fireplace, which is often stricter than a masonry opening.
If the listing plate is still on the firebox, photograph it. That plate wins every argument.
Step-by-Step: Attaching a Fireplace Mantel (Floating Beam)
This is the sequence we want customers to follow for an Ashdeco-style solid wood shelf.
- Tape the outline. Painter's tape the bottom and ends. Sit on the sofa. If it looks high, it is high.
- Confirm clearance. Wood mantel vs firebox opening. Minimum 6". More for an 8" depth. Local code and the fireplace manual override this paragraph.
- Locate structure. Studs or sound masonry.
- Mark fastener centers on the wall. Level. Measure twice from the firebox centerline so the beam is not 3/4" off to the right.
- Drill the wall.
- Template the mantel back. Do not eyeball rod holes in a live-edge slab.
- Dry-fit. This is the step people skip and then regret.
- Set mechanical fasteners / epoxy. Wait.
- Install the beam. Adhesive in wood holes if using rods. Brace until cure.
- Check level again. Front-to-back as well as left-to-right. A shelf that tips forward dumps objects into the firebox.
- Load later. Give epoxy the full cure time on the tube. Overnight is not a personality trait. It is chemistry.
Live-edge pieces are not perfectly straight on the back. We mill a mounting face, but expect to shim. That is normal, not a defect.
Product-side starting points: sustainable solid wood fireplace mantel and rustic wooden fireplace mantel. Collection: fireplace shelves.

Clearance Recap (Do Not Skip Because the TV Fit)
National-style guidance for combustibles around a masonry opening:
- Never closer than 6" to the firebox opening
- Deeper projections need more vertical distance
- 12" above the opening is a common planning number for a typical 6-8" mantel - confirm locally
- Factory-built fireplaces: the manual wins
Heat shields exist for tight renovations. They are not an excuse to ignore the listing.
Full explanation: mantel on fireplace height and clearance.
When to Hire a Pro
Hire out the install if:
- The mantel is over ~100 lbs
- The wall is rubble stone, historic brick, or unknown veneer
- You cannot find studs and the finder keeps lying
- You need to drill granite or a chimney breast that might be structural
- A TV will sit above and the chase has to hide cables and a heat gap
- You are not willing to wait for epoxy
A good carpenter or mantel installer will still use the same methods. You are paying for the hammer drill, the level, and the fact that they have dropped one of these before.
Common Fireplace Mantel Installation Mistakes
Caulk as structure. Silicone holds dust. It does not hold a beam.
Mortar-only anchors in soft joints. Looks fine in October. Loosens in April.
Too few rods for the span. A 60" shelf needs two rods minimum. Push past 60" and you need three - one pin, or even two spread too far apart, lets a long beam rotate or sag at the ends.
Ignoring the centerline. Off by an inch is all anyone will see.
Loading the same day. Epoxy packages are optimistic. Wait.
No helper. You will mark one side high.
Mounting to tile only. Tile is a finish. Go through to what is behind it.
FAQ
How do you install a fireplace mantel?
Find structure (studs or masonry), set rods, lags, or a ledger, dry-fit the shelf, then fasten. The wall type picks the hardware.
How is a fireplace mantel attached?
Most floating wood mantels use hidden steel rods or a ledger cleat. Surrounds with legs often sleeve over masonry-screwed 2x4s. Corbels add front support.
Can you install a mantel on drywall?
Yes, if you hit studs. Drywall anchors alone are not enough for a solid wood fireplace mantel.
How do you attach a fireplace mantel to brick?
Hammer-drill into brick, set masonry anchors or epoxy-set rods, then slide or screw the mantel on. Do not rely on adhesive.
How long does fireplace mantel installation take?
A floating beam on a known stud wall is often 1-2 hours plus finish cure. Masonry with epoxy is a two-visit job: drill and set, then hang after cure.
Get the wall right and the mantel looks like it grew there. Get the wall wrong and you will be filling holes in brick for the rest of the year. If you send us a photo of the fireplace wall, we will tell you which of these methods we would actually use.